
I recently ran out of room on my Proxmox installation SSD. To be fair, it was not that difficult since it is only 120GB. Big mistake for not buying a larger one initially, I just did not know what my plans were at the time or that the Intel i5-12400 I have in there would be so powerful. I thought I would be CPU limited before storage, but running all my services and with a few people on my Valheim server it only reaches around 3-5% CPU usage with a low load averages of around 0.20, 0.21, 0.32. Therefore in order to get the most out of my machine and be able to host more services, games, and other things I definitely need more space.
Now I do have a NAS with plenty of storage space available, especially since I have two more 4TB HDDs coming soon. Proxmox easily allows you to integrate this via SMB/CIFS or ZFS shares.
I could just store my VMs and LXC containers on the NAS. However, this would be slow compared to a local SSD.
Now overall I like Proxmox and I use it instead of the many other solutions because of its great LXC container support which are much more lightweight than a full VM. The annoying thing about Proxmox is you have to have a cluster if you want to easily clone or move hosts between machines. Now clustering can definitely be a great feature, especially in enterprise scenarios, but in my homelab when I am trying to move from one SSD to another on the same server I do not really have the option to cluster.
Even when using Proxmox Backup Server to manage backups like I am, you need a cluster to restore to a different machine than they were created on.
Luckily, Proxmox will also just let you back up to pretty much any kind storage device you have.
Shout out to Craft Computing for having this excellent video which goes through basically a similar scenario that I am in.
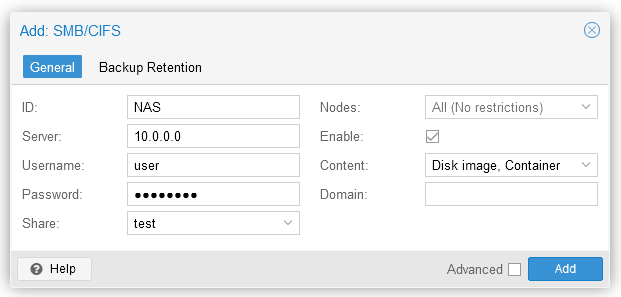
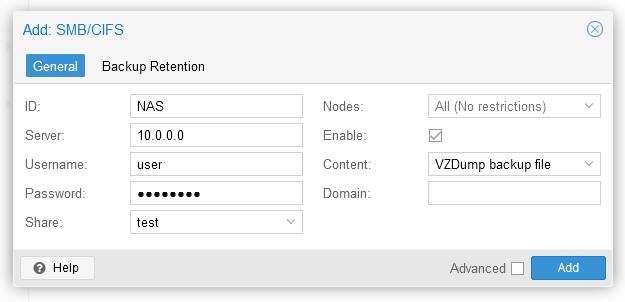
The basics of it is you add your storage, in my case a CIFS share. Fill in like you were connecting to it for data storage, but for the Content section select VZDump backup file.
From here you can either go manually backup every VM and container or to back them up all at once you can go to Datacenter -> Backup and create a new backup job.
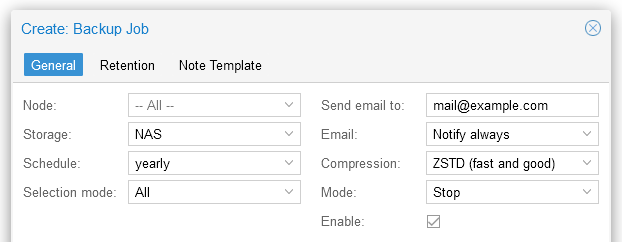
Select your storage. Schedule it whenever, we’re going to manually run it next. I selected All VMs and containers. For compression ZSTD is a good option. For Mode I selected Stop. I am not sure this makes much difference, but in my mind it ensures that the filesystem is not modified while creating the backup. Then click create.
Once created. Select your backup job and click run now.

This will run you backup job and store the backups on your selected storage.
Now go to your new machine, mount your storage like you did when we created the SMB/CIFS share. Naviage to your Storage -> Backups and you should now see the backups you just made from the previous machine.
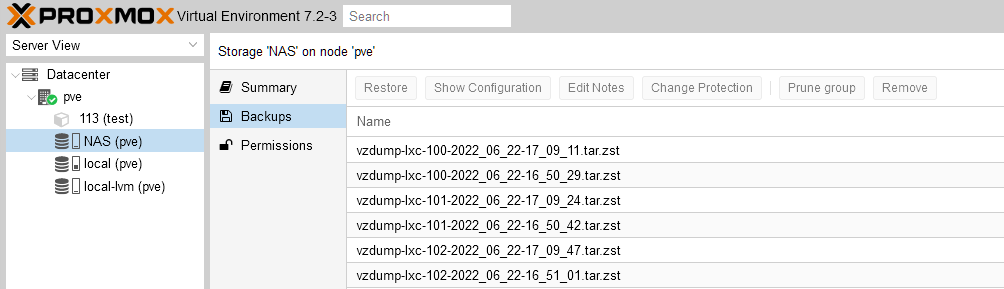
Then it is as simple as selecting each backup and restoring them.
