
Well the work for this post actually started in the middle of working on the post for Day 1, but ended today on Day 2. Like any good homelabber I got nerd sniped by myself.
When making the post for Day 1, I wanted to edit and view in real time and didn’t want to push all of those changes continuously to my live website. Plus Github CI/CD can be a bit slow. So I decided that I wanted to host my own CI/CD server.
I’ve had my Gitea instance up for a bit now (although I accidentally nuked it setting up CI, good thing for backups) and knew it had CI/CD integrations thanks to Awesome Gitea. So I went to work.
Choosing the right CI/CD server
Really there is no magic here, I went with what looked good visually and looked easy to set up. For me that was Drone CI. Not to say it didn’t have it’s downsides. Throughout this experience I found it’s documentation lacking.
Setting up Drone CI with Gitea
I chose to edit my current docker-compose.yml file that already contained my Gitea config and just add in Drone CI with it. This kept everything organized in one place instead of spinning up a new LXC container for Drone. My Gitea config, before Drone CI, can be found on my github. It gives a decent base setup for Gitea with every change for Drone CI just in the docker compose file.
Along with Drone CI, I also installed the drone-runner-docker image. This lets you use and run docker images in your CI/CD build and deploy scripts. Below are the additions the my Gitea docker-compose.yml file:
1
2
3
4
5
6
7
8
9
10
11
12
13
14
15
16
17
18
19
20
21
22
23
24
25
26
27
28
29
30
31
32
33
34
35
36
37
38
39
40
41
42
43
44
...
  drone:
    image: drone/drone:latest
    container_name: gitea-drone
    ports:
      - 81:80
      - 8000:8000
    volumes:
      - /var/run/docker.sock:/var/run/docker.sock
      - ./data:/data
    restart: always
    depends_on:
      - gitea
    links:
      - gitea
    environment:
      - DRONE_AGENTS_ENABLED=true
      - DRONE_GITEA_CLIENT_ID=
      - DRONE_GITEA_CLIENT_SECRET=
      - DRONE_GITEA_SERVER=https://git.domain.tld
      - DRONE_GIT_ALWAYS_AUTH=false
      - DRONE_TLS_AUTOCERT=false
      - DRONE_SERVER_HOST=drone.domain.tld
      - DRONE_SERVER_PROTO=https
      - DRONE_RPC_SECRET=
      - DRONE_LOGS_DEBUG=false
      - DRONE_ADMIN=your_user_name
      - DRONE_USER_CREATE=username:your_user_name,admin:true
  drone-runner-docker:
    container_name: gitea-drone-runner-docker
    image: drone/drone-runner-docker:latest
    restart: always
    depends_on:
      - drone
    volumes:
      - /var/run/docker.sock:/var/run/docker.sock
    links:
      - drone
      - gitea
    environment:
      - DRONE_RPC_HOST=drone.domain.tld
      - DRONE_RPC_PROTO=https
      - DRONE_RPC_SECRET=
      - DRONE_RUNNER_NAME=drone-runner-docker
A bit of an explanation
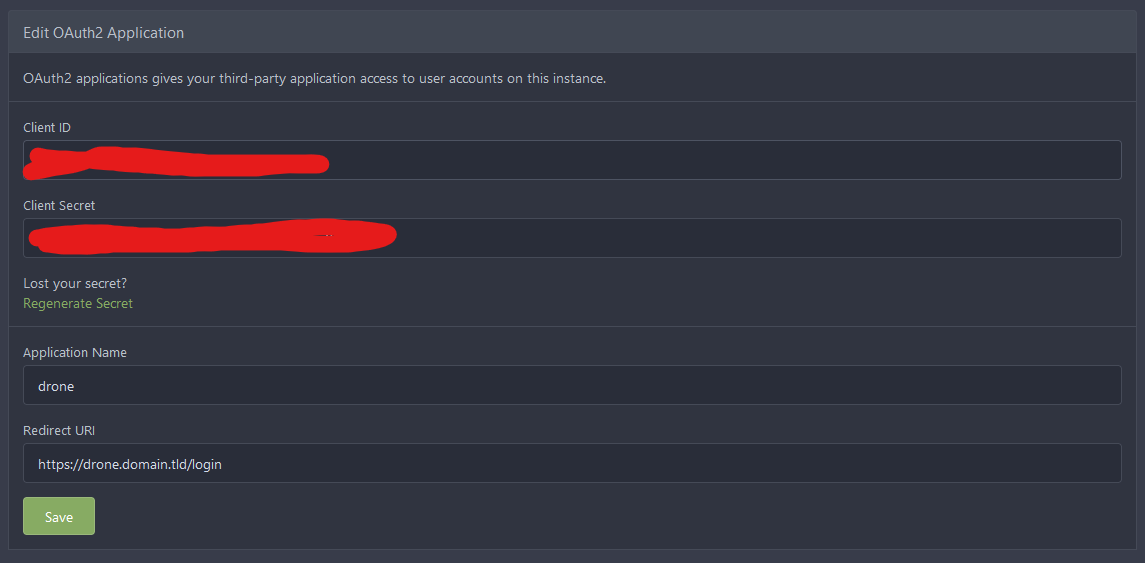
The DRONE_GITEA_CLIENT_ID and DRONE_GITEA_CLIENT_SECRET come from Gitea itself, so you have to have it set up beforehand. You go to your User Settings -> Applications, then at the bottom you’ll add an Oauth2 Application
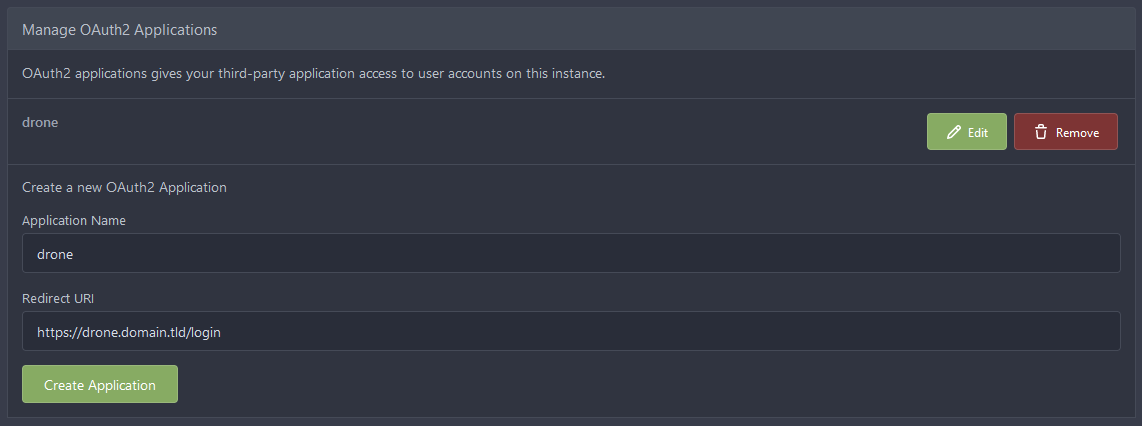
Once you do that and click Create Application it will show you your Client ID and Client Secret
The DRONE_RPC_SECRET can be generated by running the command
1
openssl rand -hex 16
Finally, in your docker-compose.yml file, your_user_name should be set to your Gitea username, not email, so you can be the admin in Drone CI.
1
2
3
4
...
      - DRONE_ADMIN=your_user_name
      - DRONE_USER_CREATE=username:your_user_name,admin:true
...
Then just run docker compose up -d --force-recreate and you should be able to navigate to Dron CI’s webpage at port 81 of your host.
Setting up Drone CI
Once at Drone CI’s webpage, you’ll be asked for some basic information and then to log in. After that you’re ready to start adding CI/CD scripts.
First, you need to activate each repository you want to enable Drone CI on.
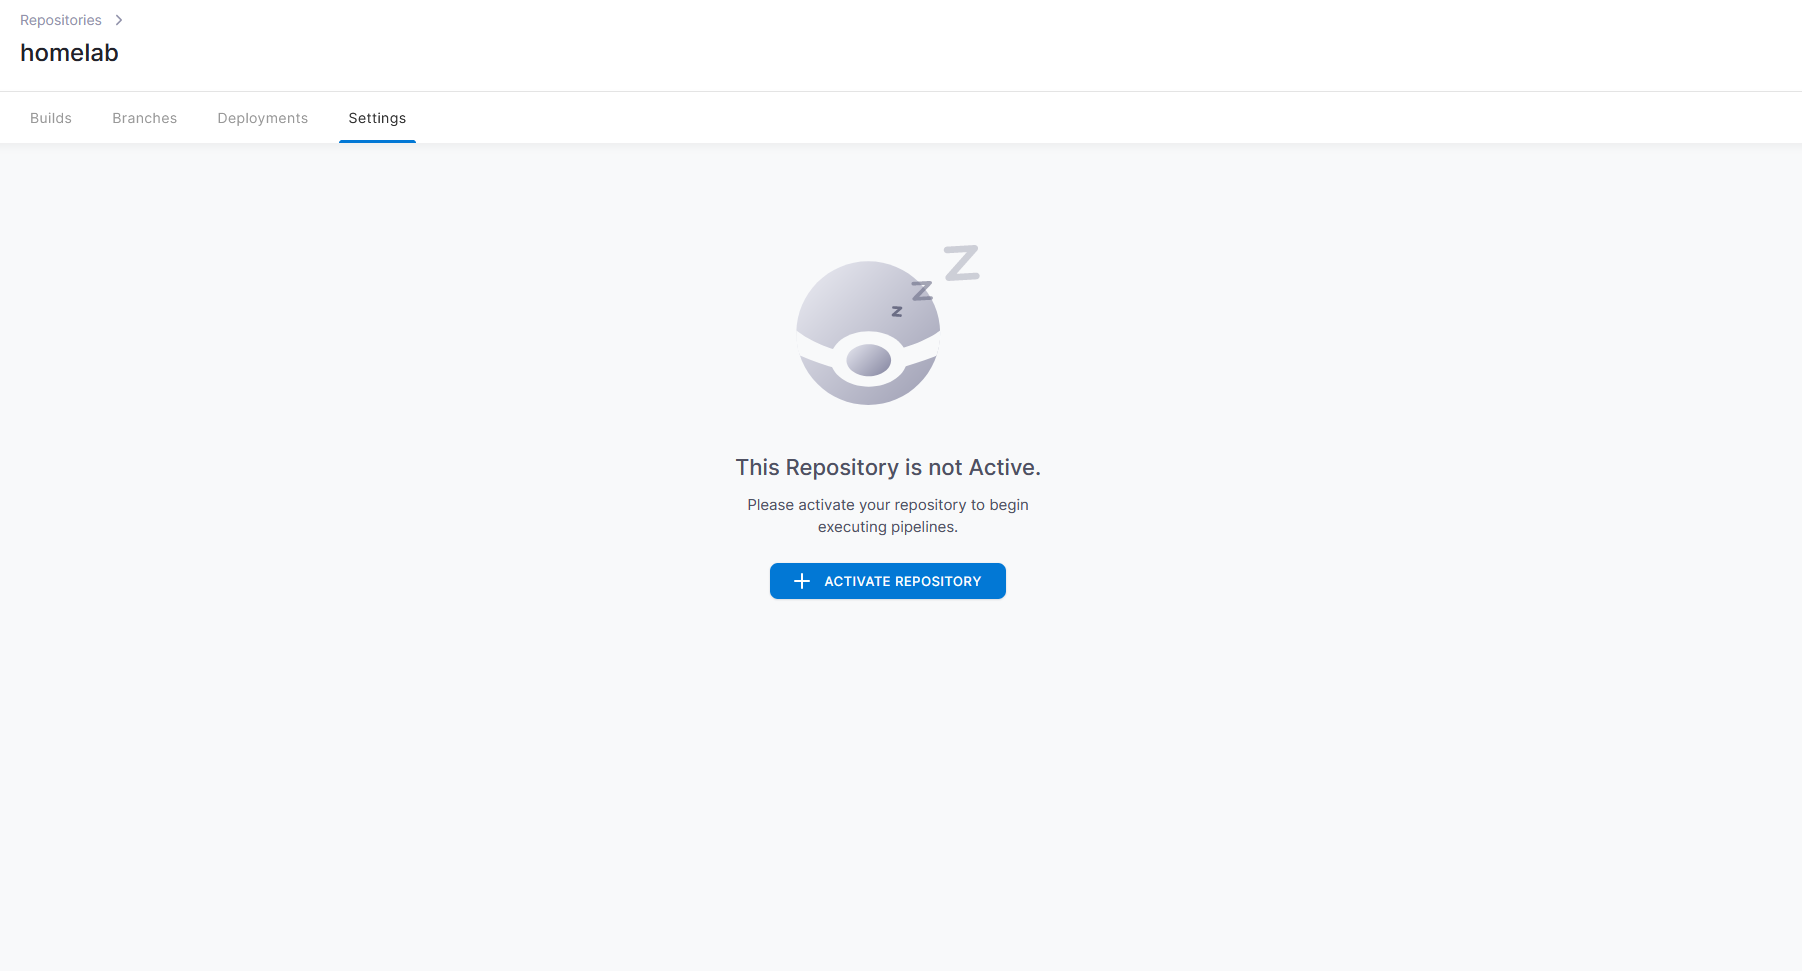
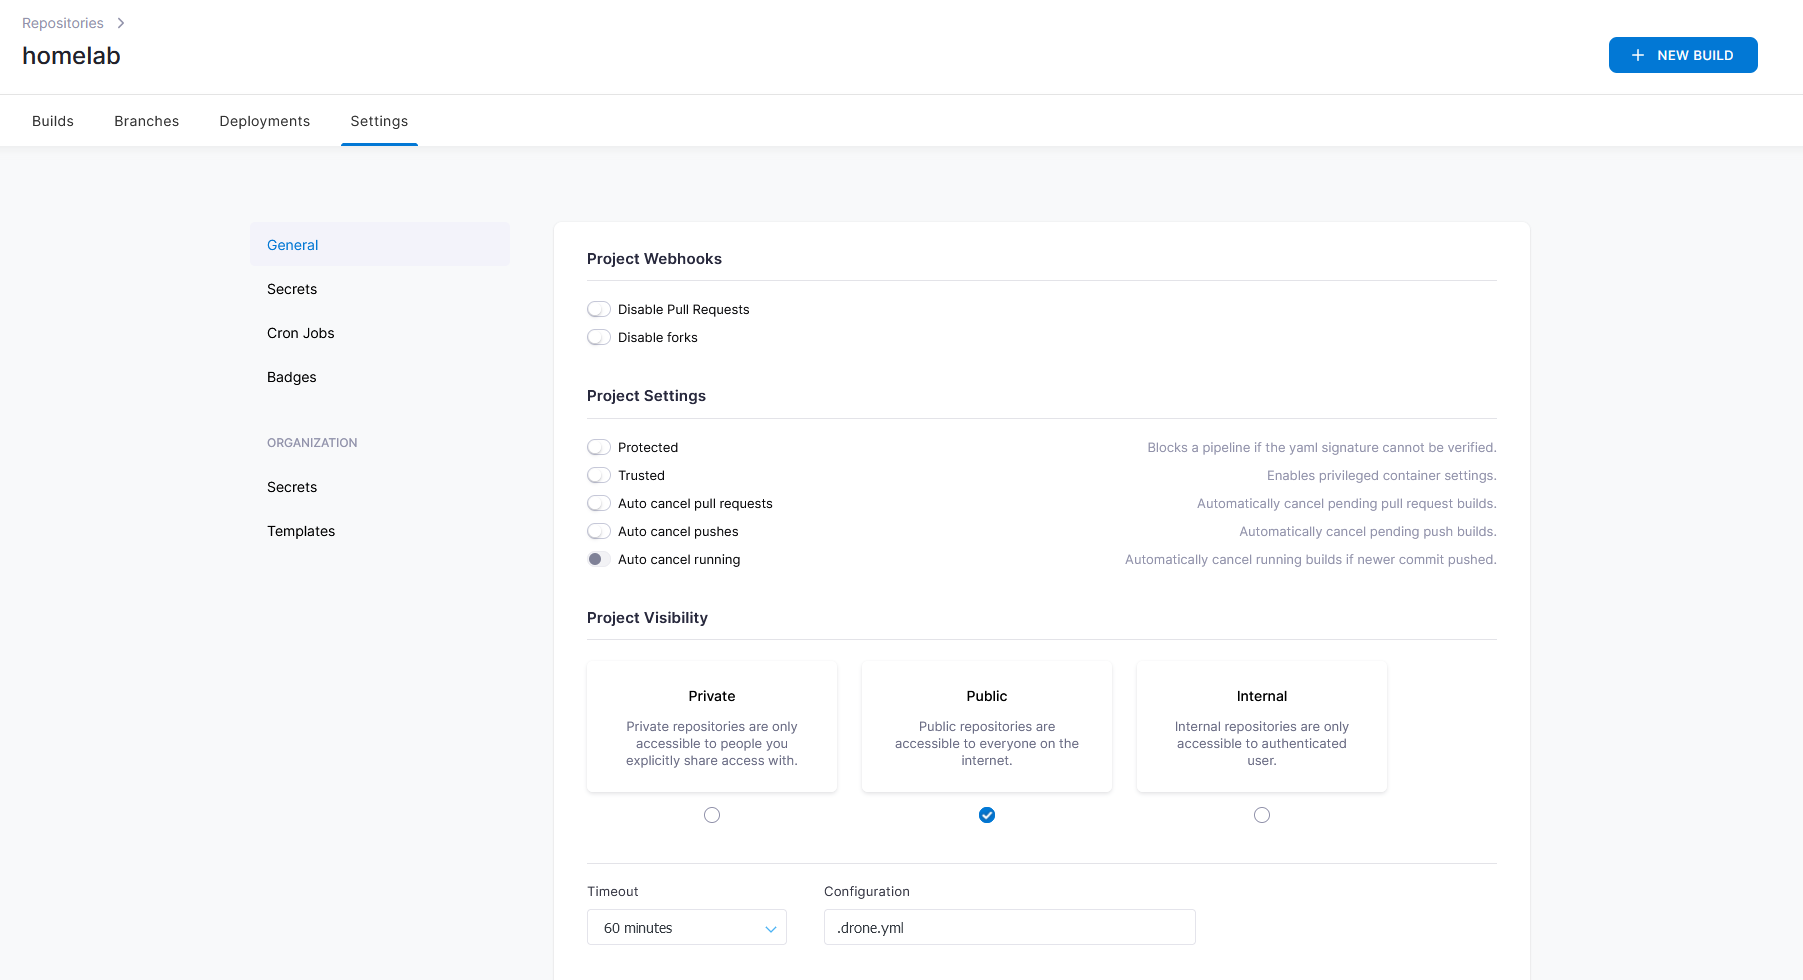
Once activated you’ll be shown a settings page for the repository. I suggest disabling Pull Requests and disabling forks. Also, if you want to use dependency caching to speed up build times, turn on trusted mode. However, note that trusted mode lets your build script mount files directly to the host machine.
Setting up your repository
Once you’ve enabled your repository in Drone, you can add a .drone.yml file to your repository. This will be your CI build/test/deploy script. Below is an example of the one I use for this website
1
2
3
4
5
6
7
8
9
10
11
12
13
14
15
16
17
18
19
20
21
22
23
24
25
26
27
28
29
30
31
32
33
34
35
36
37
38
39
40
41
42
43
44
45
46
47
48
49
50
51
52
53
54
55
56
57
58
59
kind: pipeline
type: docker
name: default

platform:
  os: linux
  arch: amd64

steps:
- name: restore-cache
  image: drillster/drone-volume-cache
  volumes:
  - name: cache
    path: /cache
  settings:
    restore: true
    mount:
    - vendor
  ttl: 7

- name: build
  image: ruby:3.0
  commands:
    - bundle config set --local deployment 'true'
    - bundle install
    - JEKYLL_ENV=production bundle exec jekyll build --verbose

- name: rebuild-cache
  image: drillster/drone-volume-cache
  volumes:
  - name: cache
    path: /cache
  settings:
    rebuild: true
    mount:
    - vendor

- name: stage
  image: appleboy/drone-scp
  settings:
    host: ssh.staging.domain.tld
    username:
      from_secret: staging_username
    password:
      from_secret: staging_password
    port: 22
    target: /var/www/html/${DRONE_REPO}/
    source: _site

trigger:
  branch:
  - main

volumes:
- name: cache
  host:
    path: /var/lib/drone/temp

branches: main
What this does is loads any cached dependencies, build the website, save dependencies to the cache directory, and then deploy the website to my staging host where I can view the results before they’re pushed live.
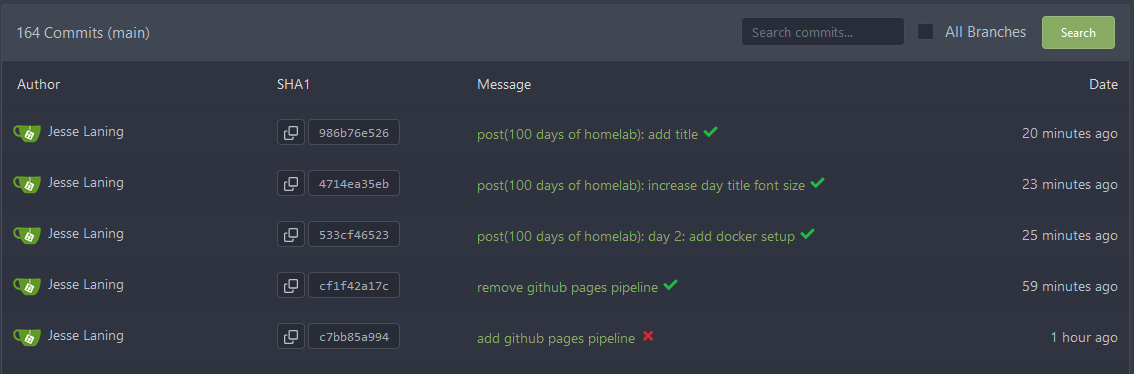
Once you push your .drone.yml file to your main branch of your Gitea instance, Drone will automatically run this script.
And that’s pretty much it. You’ll be able to view your results in the Drone CI web interface as well as in your Gitea repository.
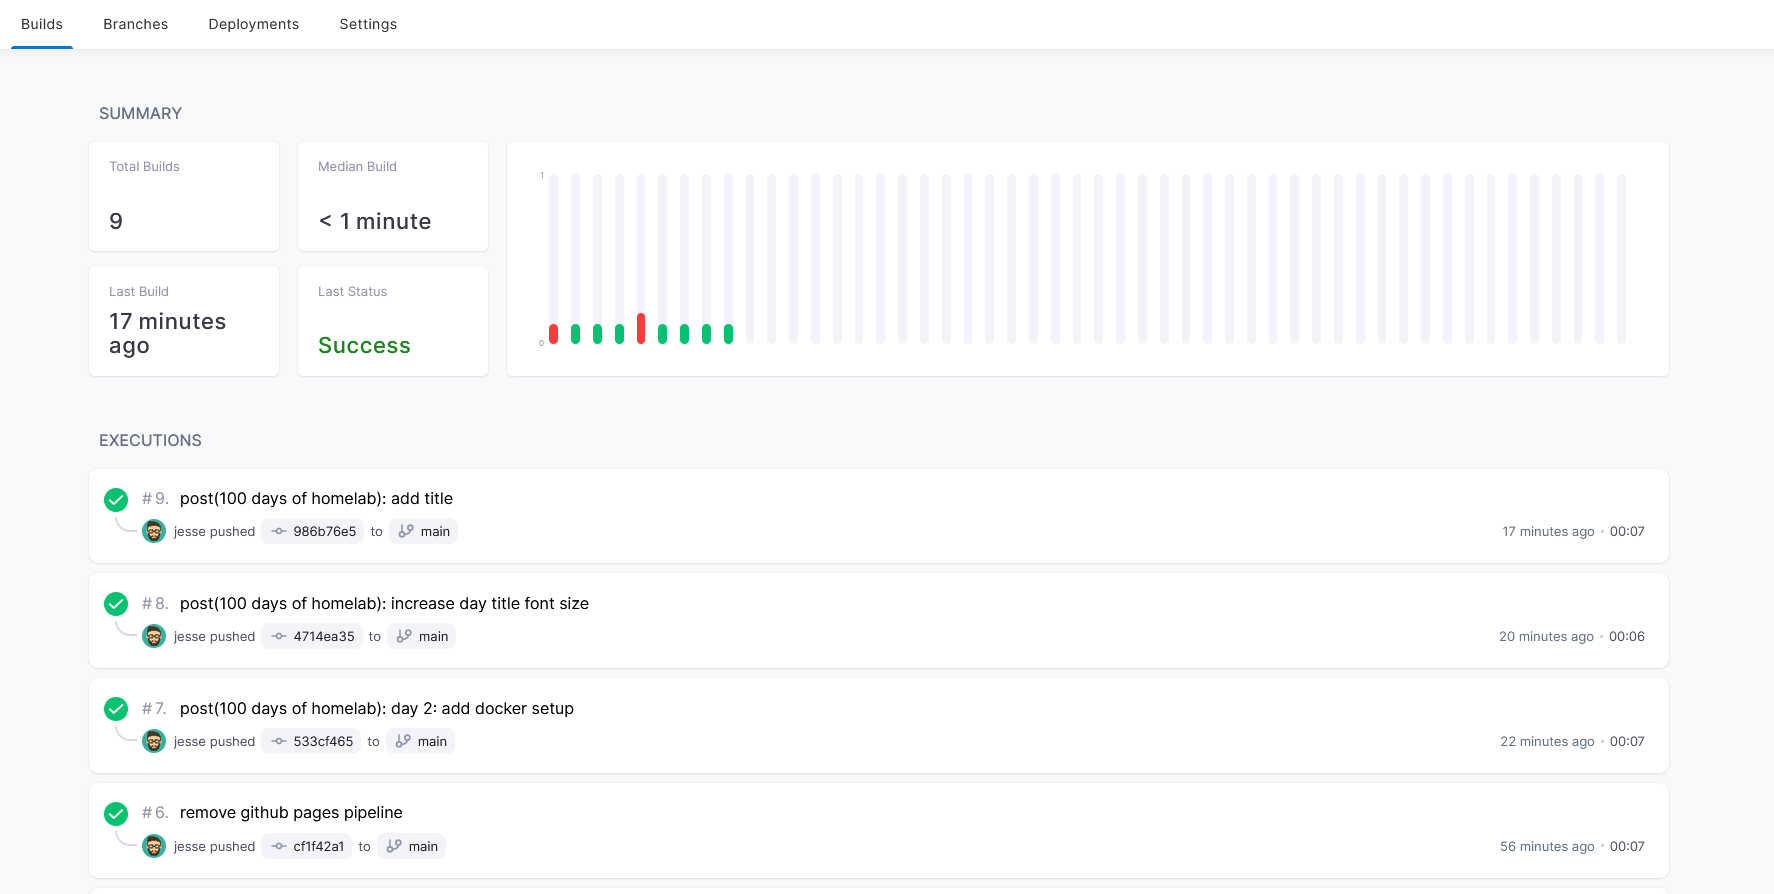
and be able to add badges to your repository README.md to show the build status:
