Today I happened to be getting a Ubiquiti U6-AP-Pro delievered and after yesterdays stressful, but eventually successful, VLAN setup, I was destined to get VLANs on my Wi-Fi going. Thankfully, for better or for worse, the UniFi Network Application kind of abstracts a lot of the work away.
Setup UniFi Netowrk Controller
However, first I needed to get the UniFi Network Application. To do this, I just spun up a LXC container with Docker installed. The docker-compose.yml file looks something like this:
1
2
3
4
5
6
7
8
9
10
11
12
13
14
15
16
17
18
19
20
21
22
23
version: "3.8"
volumes:
  config:
services:
  unifi-controller:
    image: lscr.io/linuxserver/unifi-controller:latest
    container_name: unifi
    environment:
      - PUID=1000
      - PGID=1000
    volumes:
      - config:/config
    ports:
      - 443:8443
      - 3478:3478/udp
      - 10001:10001/udp
      - 8080:8080
      - 1900:1900/udp
      - 8843:8843
      - 8880:8880
      - 6789:6789
      - 5514:5514/udp
    restart: unless-stopped
This is basically an exact copy of the docker-compose.yml that Linuxserver gives, except I map port 8443 to 443 just so I don’t see the dangling port in my web browser. It’s also important you do not remap any of the ports as they are hard-coded into Ubiquiti devices.
If you’re running this in Docker like I am, one import setting to change is in Settings -> System and then scroll all the way down to the bottom and look for Overide Inform Host (for me it was the last setting). You’ll want to enable this and then give it the local IP of your Docker host

If you do not change this you will not be able to adopt any UniFi devices.
VLANs
VLANs are pretty simple in UniFi controller with the U6-AP-Pro as when you assign it in the interface it’s not dumb like I am and already knows to give itself a trunk port.
First go to Settings -> Networks and you’ll want to click the button that says Create New Network
- Give your network a name
- Now if you’re like me and don’t have a UniFi OS console (I run an OPNsense router) you’ll want to check the
VLAN-only Networkbox - Give it a VLAN ID
- Enable IGMP Snooping or DHCP guarding if you’d like
and then click Add Network.
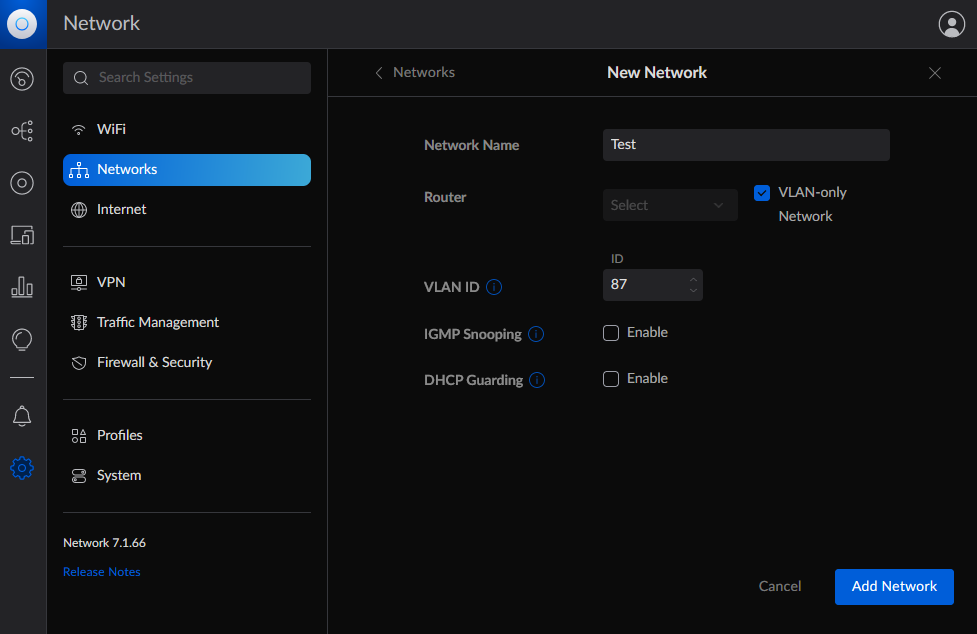
Now you should see it listed in your Networks page.
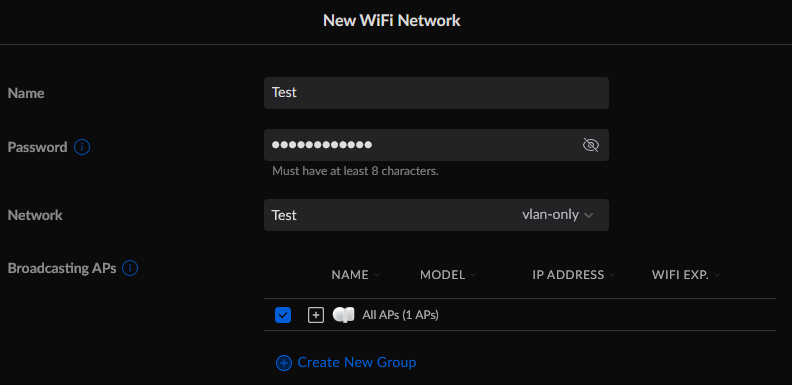
Next go to Settings -> WiFi and click Create New WiFi Network.
- Give your WiFi Network a name, this will be the broadcase SSID
- Give it a password
- In
Networkselect the new Network you just created - Select which Access Points you want to have this network (for me I only have one so I clicked
All APs)
Now this is all you need for a basic set up but I’m going to go ahead and add a Guest Portal for fun.
Guest Portal
Now, I don’t *need* a guest portal, but because it’s my network and I like to experiment, I set one up anyway.
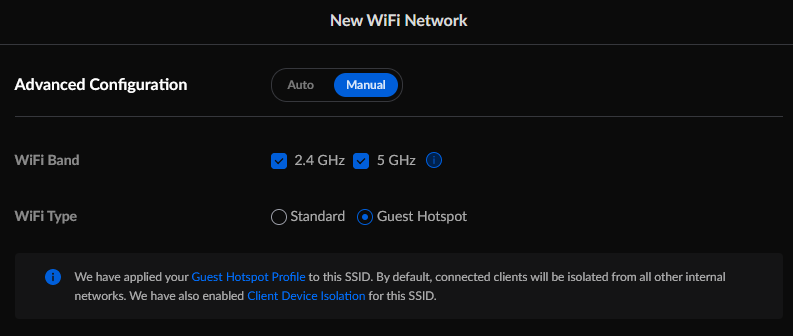
To begin, scroll down to Advanced Configuration
- Switch from
AutotoManual - If you want to limit guests to 2.4GHz you can do that here, you can also set bandwidth limits later on
- For
WiFi Type, selectGuest Hotspot
This is all the configuration that needs to be done here, but there are plenty more settings like Client Device Isolation you can go tweak later on.
Now you can click the Guest Hotspot Profile link and it will open in a new tab. You can go back to the New WiFi Network tab and click Add WiFi Network. Now migrate back to the Guest Hotspot tab.
To begin, select an Authentication Type, here I’ve selected Password to have a simple password. There are several types to choose from, even a payment based authentication if you wanted to charge your friends and family to use your internet.
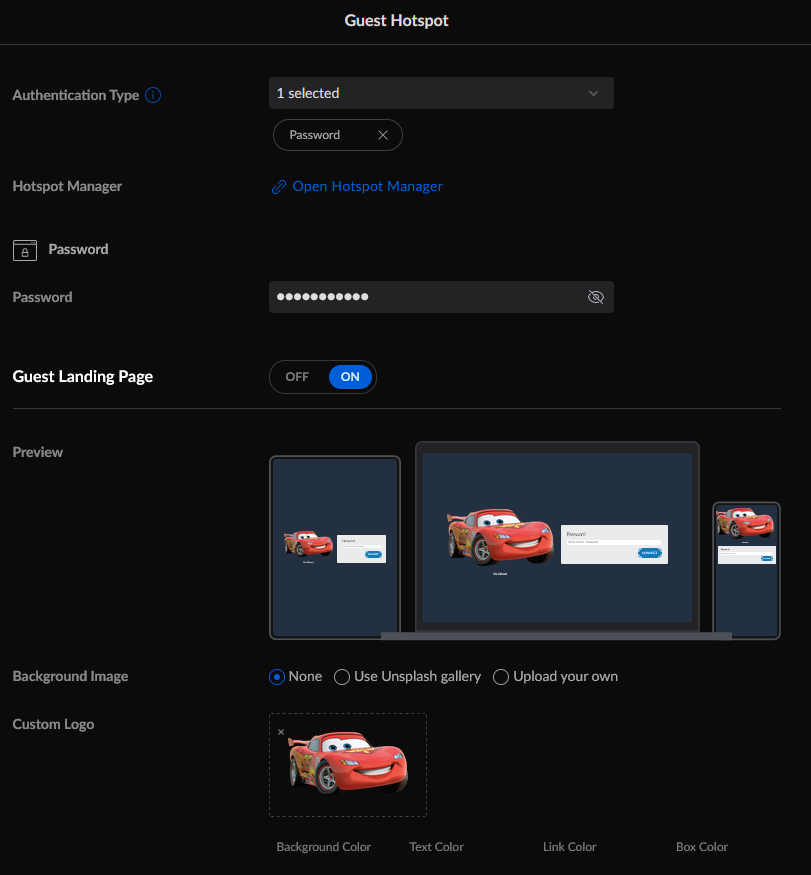
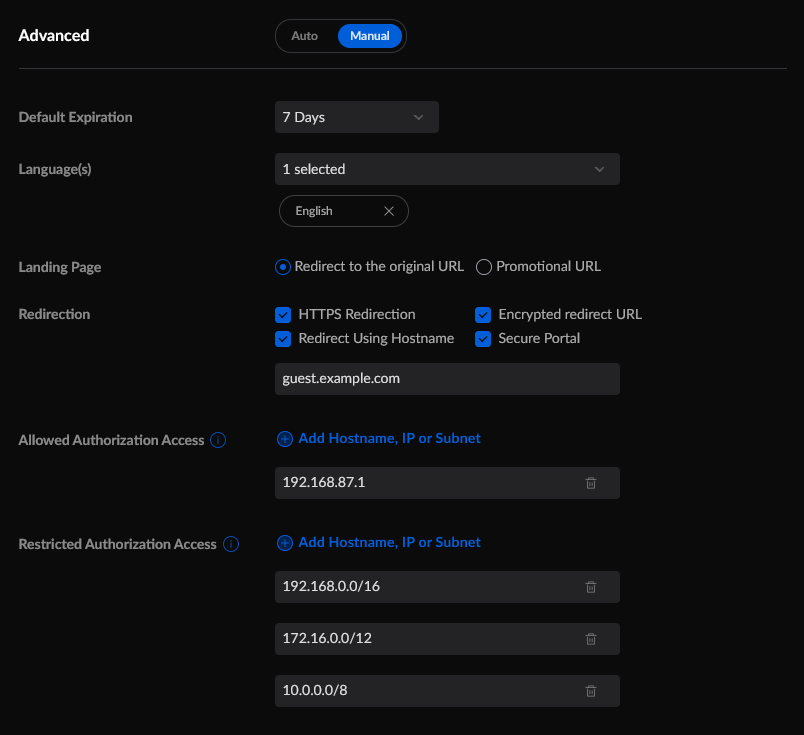
Next, turn the Guest Landing Page on. The preview feature for this is really great in my opinion. Go through and set it how how you want it to look and then once you get to the Advanced tab, switch to manual.
Set your expiration time. Configure any languages. Here I’ve set it to use a custom domain guest.example.com. Now you’ll need to make sure you have a local DNS server that will return a response for this domain, and this response needs to either point at your UniFi Network Application server or in my case, a proxy that points to it. Also you will have to ensure that your firewall rules allow your VLAN access to these devices.
Unfortunately UniFi hard codes the 8843 port into the guest landing page redirect, even if you use a custom domain, so you need to make sure if you’re using a proxy that it binds 8843
Now I’m not 100% sure this is necessary but I’ve added my proxy as an Allowed Authorization Access IP. The reason why I’m not sure is because my proxy is actually run on my gateway.
Now click Apply Changes and you should be all set.