![]()
Proton Mail is a secure and encrypted email service that uses client side encryption to ensure your data is encrypted before it is sent. This offers a greater level of security of regular old email, but the trade-off being that you need to use one of Proton Mail’s clients to be able to do the client side encryption. This is perfectly workable for the normal user, but for people like me, who use 3rd-party email clients like Thunderbird or self-host applications that use SMTP email for password resets, notifications, etc. this can cause issues since they do not have the client side encryption support that lets them directly use Proton Mail’s services to send emails.
Proton Mail Bridge
Luckily, Proton Mail offers their Proton Mail Bridge application that allows you (with a paid account) to integrate Proton Mail with any program that supports IMAP and SMTP. And this mostly works with one caviat:
This is fine for applications that let you easily add certificate exception like Thunderbird
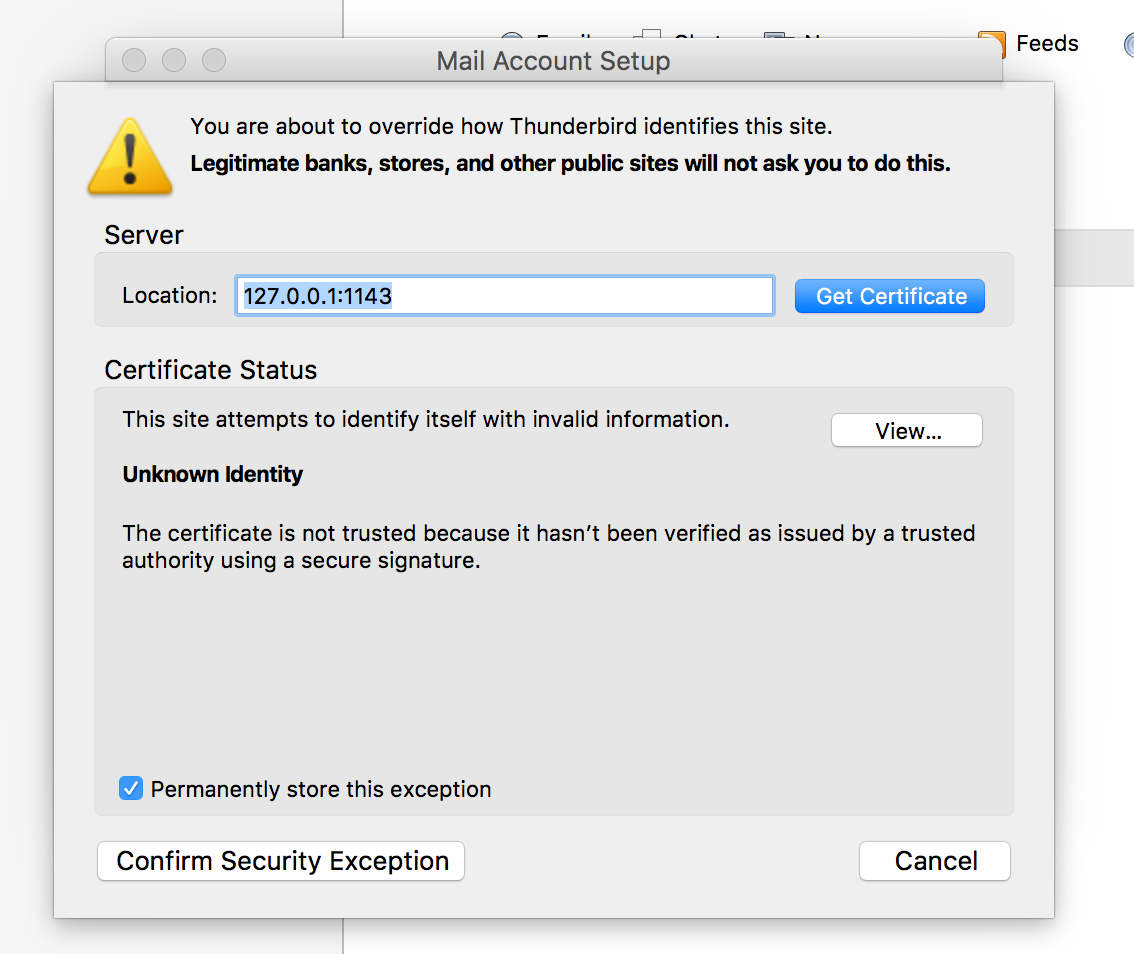
However, many other applications, especially self-hosted ones will throw errors when given a self-signed certificate. A few applications that gave me this issue are:
- Nextcloud
- Uptime Kuma
- Ghost
- Bookstack
At least with Nextcloud I was able to get around this issue by adding these parameters to it’s config.php file
1
2
3
4
5
6
7
8
9
'mail_smtpstreamoptions' =>
array (
  'ssl' =>
  array (
    'allow_self_signed' => true,
    'verify_peer' => false,
    'verify_peer_name' => false,
  ),
),
However, I did not want to spend hours digging around for documentation specific to each application to allow self-signed SSL certificates and there is no guarentee that I would even be able to.
This is where Let’s Encrypt comes in.
![]()
Let’s Encrypt
Let’s Encrypt is a non-profit certificate authority run by Internet Security Research Group that provides X.509 certificates for Transport Layer Security (TLS) encryption at no charge. Here’ we are going to use Let’s Encrypt certificates to replace the self-signed ones that Proton Mail Bridge generates itself. This should fix errors that come with using self-signed certificates and finally allow our applications to use Proton Mail to send emails.
Installation
Note: I do not suggest exposing Proton Mail Bridge to the internet as it defeats some of the purpose of Proton Mail
Generating Certificates with Let’s Encrypt
First, let’s generate our certificates so they are ready to go when we install Proton Mail Bridge. I personally use Cloudflare as my DNS provider which has great support built into Let’s Encrypt’s certbot tool which is the tool we will be using to generate certificates.
We will be generating a wildcard certificate so a DNS entry is not needed in Cloudflare for the subdomain and it will obscure information for anyone looking at the Let’s Encrypt Certificate Transparency (CT) Logs.
To do this first create a place to store the certificates in a known place:
1
mkdir -p ~/docker/certbot/certs
Next, for Cloudflare, we need to create a cloudflare.ini file (~/docker/certbot/cloudflare.ini) that contains your Cloudflare token for the DNS-01 challenge. Documentation for this can be found here
1
dns_cloudflare_api_token = ...
Then we can go ahead and generate our certificate.
1
2
3
4
5
6
docker run -it --rm --name certbot -v "/root/docker/certbot/certs:/etc/letsencrypt" \
  -v "/root/docker/certbot/cloudflare.ini:/cloudflare.ini" certbot/dns-cloudflare \
  certonly --dns-cloudflare --dns-cloudflare-credentials /cloudflare.ini \
  -m changeme@example.com --agree-tos --no-eff-email \
  --dns-cloudflare-propagation-seconds 20 \
  --cert-name 'domain.tld' -d 'domain.tld' -d '*.domain.tld'
This should generate your wildcard certificate in /root/docker/certbot/certs/live/domain.tld/ where you’ll find the files README, cert.pem, chain.pem, fullchain.pem, privkey.pem
Next we will set up a simple Cron job to renew this certificate every 3 months by running the same command we just ran and appending the command to restart the Proton Mail Bridge service we’ll start below.
1
0 0 1 */3 * docker run -it --rm --name certbot -v "/root/docker/certbot/certs:/etc/letsencrypt" -v "/root/docker/certbot/cloudflare.ini:/cloudflare.ini" certbot/dns-cloudflare certonly --dns-cloudflare --dns-cloudflare-credentials /cloudflare.ini -m changeme@example.com --agree-tos --no-eff-email --dns-cloudflare-propagation-seconds 20 --cert-name 'domain.tld' -d 'domain.tld' -d '*.domain.tld' && docker restart protonmail-bridge
Installing Proton Mail Bridge
To install Proton Mail Bridge we will be using Docker. Proton Mail Bridge does not have an official Docker image so this one by shenxn will be used.
To start, we need to initialize the Proton Mail account. Run the following command and wait for it to start up its own command line interface.
1
docker run --rm -it -v protonmail:/root shenxn/protonmail-bridge init
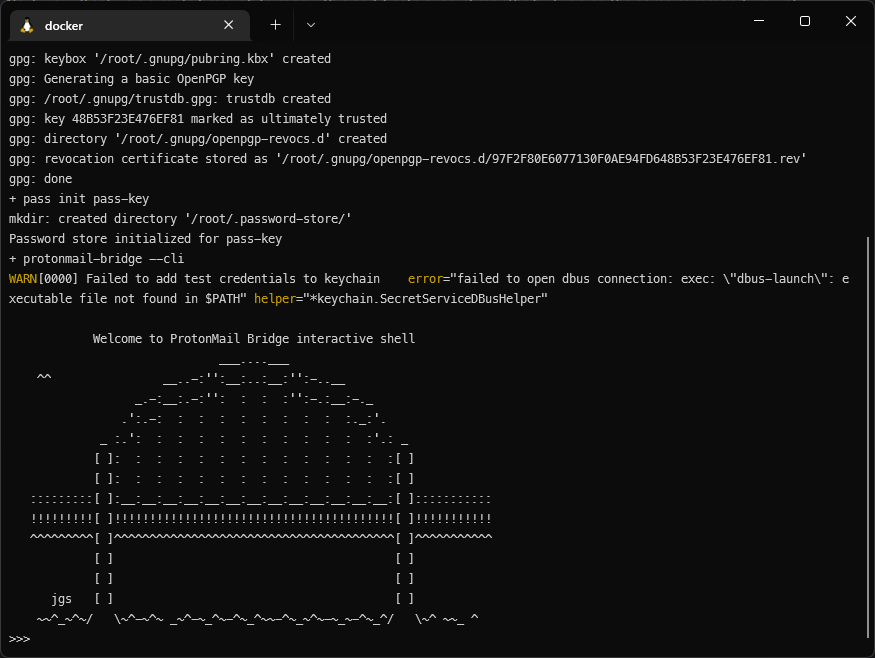
Here you’ll want to enter the login command to log into your Proton Mail account.
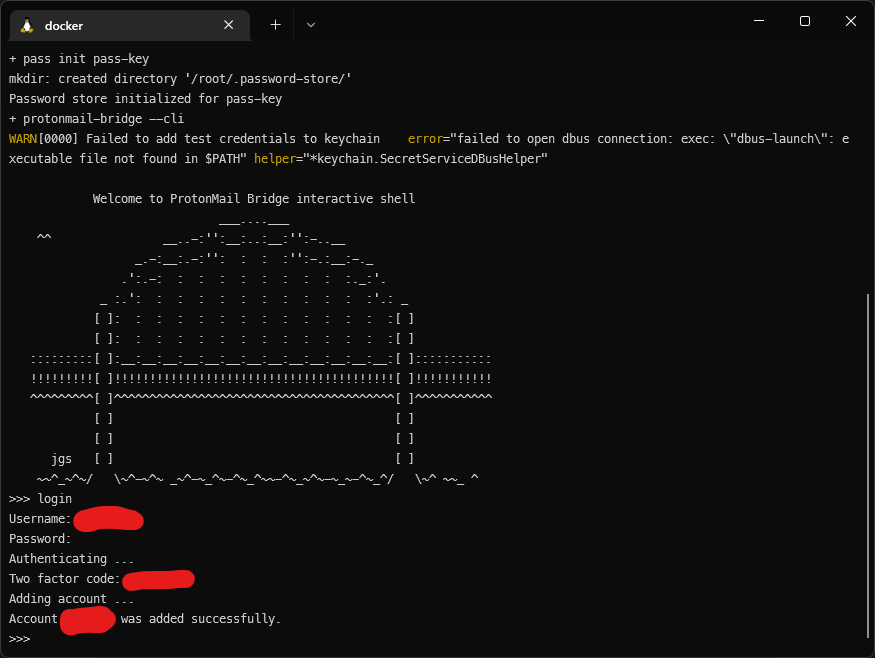
Once you’ve logged in, enter the info command to get your local username and password for the Proton Mail Bridge.
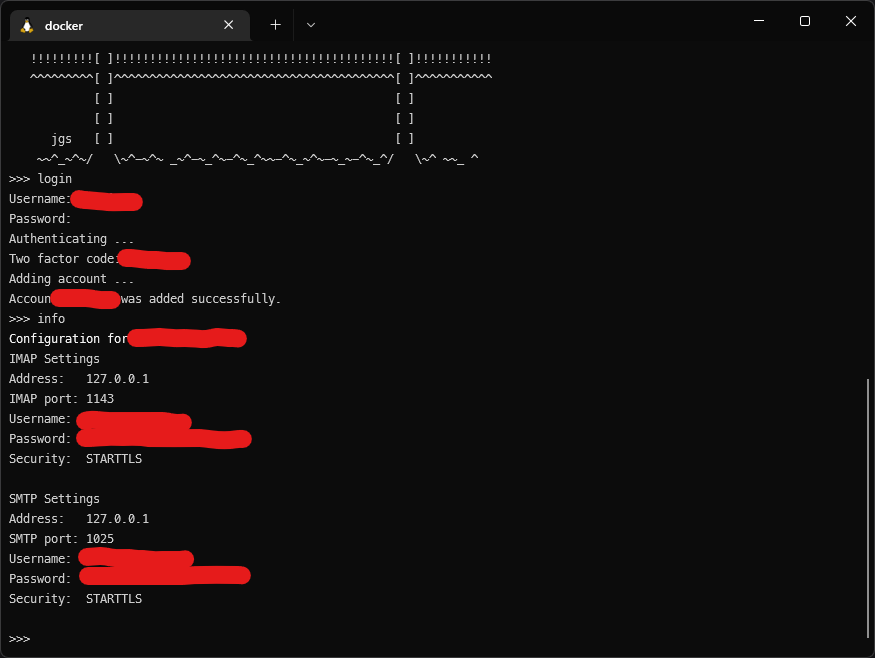
Save this information as you’ll use it to send and receive emails from your applications. Enter the exit command to exit the Proton Mail Bridge configuration tool.
Now we are going to start the Proton Mail Bridge service with our generated certificates. This will allow us to use IMAP and SMTP locally.
1
2
3
4
5
docker run -d --name=protonmail-bridge \
  -v /root/docker/certbot/certs/live/domain.tld/privkey.pem:/root/.config/protonmail/bridge/key.pem:ro \
  -v /root/docker/certbot/certs/live/domain.tld/fullchain.pem:/root/.config/protonmail/bridge/cert.pem:ro \
  -v protonmail:/root -p 1025:25/tcp -p 1143:143/tcp \
  --restart=unless-stopped shenxn/protonmail-bridge
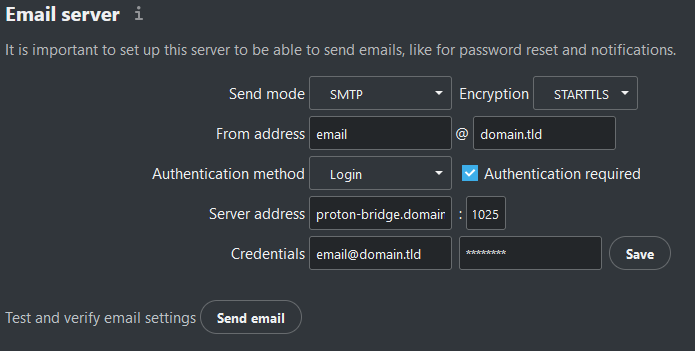
The last thing you’ll need to do is add a local DNS record to point to the Proton Mail Bridge server. The benefit of the wildcard certificate is you can name it any subdomain of your domain.tld, for instance use proton-bridge.domain.tld to point to your local server hosting Proton Mail Bridge. Or if you have multiple users using your local DNS service, you can name it something random to obscure the nature of it. Finally, you can use your credentials and the server domain name to use Proton Mail on your local network using your generated credentials. For instance, in Nextcloud it would look like this: